Creating Groups of Paths
The first step required to generate a mesh surface with the Active Contour feature is to draw a series of paths that describe the feature of interest or anatomy you need to segment. This series of paths is contained within a group of paths and each path in the group can be edited and iterated as required. For best results, you should be aware of the following whenever you add paths to a group of paths:
- The paths you create to describe the feature of interest or anatomy should be evenly spaced at regular intervals.
- Iteration, and well as manually editing, can be used to create a more precise paths.
- You should create the series paths in more than one axis orientation. If required, you can cut a generated mesh surface to create new paths in an additional orientation.
- Review the settings available for datasets and snakes (see Settings).
Active contour groups of paths can be saved in the .ORSObject file format (see Exporting Objects). You can also save groups of paths, as well as the Active Contour model settings, in a session file (see Sessions).
- Select the 2D view on which you plan to create the group of paths. Make sure that the area you plan to segment is clearly shown onscreen.
See Using the Manipulate Tools for information about manipulating views.
- Choose Tools > Active Contour on the menu bar.
The Active Contour panel appears on the left sidebar (see Active Contour Panel).
- Click the Create Group of Paths
 button at the top of the panel.
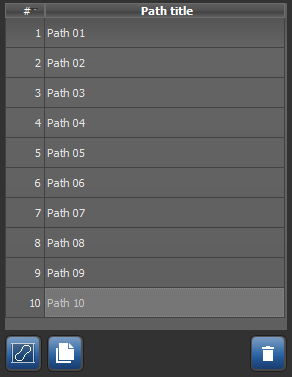
A new group of paths (Active contour paths) is added to the Data Properties and Settings panel.
- Select the dataset that will be used to compute the edge map in the drop-down menu on the Dataset tab.
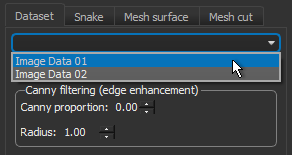
- Optimize the dataset settings, recommended.
Refer to the topic Dataset Settings for information about using leveling, Canny filtering, and smoothing to modify the edge map.
- Preview the modified edge map, recommended.
To generate a one-slice preview, click the Generate Preview button. You can view the preview, shown below, by changing its visibility in the Data Properties and Settings panel.

- Draw the first path around the feature of interest or anatomy you plan to segment. You can choose to work with the Freehand or Snap tool (see Path Tools and Options).
Do the following if you selected the Freehand
 tool:
tool:- Drag to define the required contour.

- Release the mouse to create the path, which is added automatically to the current group of paths. If necessary, you can iterate the path or adjust its contour with the Repulsor tool.
Do the following if you selected the Snap
 tool:
tool:- Drag inside the feature you want to define with the path.

The contour line will snap to the edges of the feature.
- Release the mouse to create the path, which is added automatically to the current group of paths. If necessary, you can iterate the path or adjust its contour with the Repulsor tool.
- Drag to define the required contour.
- Do the following to iterate a path, if required:
- Optimize the settings for the snake, which control the internal forces that resist deformation (see Snake Settings).
- Click the Iterate Selected Paths button at the bottom of the Active Contour panel.
You should note that you can undo an iteration by clicking the Undo Last Iteration
 button.
- Do the following to manually adjust a path with the Repulsor tool, if required:
- Hold down Left Ctrl (or your configured Repulsor tool key) and then nudge the contour into the required position.

You should note that the size of the tool is adjustable by rotating the mouse scroll wheel and that you can repulse a path from both the inside and outside of the closed path.
- Hold down Left Ctrl (or your configured Repulsor tool key) and then nudge the contour into the required position.
- Scroll through a number of image slices and then draw another contour line around the feature of interest or anatomy that you are segmenting.
Adjust the contour as described previously, if required.
NOTE You can copy a selected path to another image slice. You can also move and rotate copied paths, or any path, with the Move tools (see Using the Move Tools).
- Continue to add contour lines until the feature of interest or anatomy you are segmenting is fully described by the paths within the group of paths.
You should include paths drawn on different orientations in the group of paths that describe the feature of interest or anatomy you are segmenting.
NOTE You can quickly review and evaluate the paths in the group by selecting a path then clicking the Look at Path
 button. You can also select and look at the next or previous paths with the keyboard shortcuts Down (select and look at the next path in the group) and Up (select and look at the previous path in the group).
 - Continue to the topic Generating Mesh Surfaces to learn how to generate a mesh surface from selected active contour paths.